Ultrasonic Cleaners for Automotive Workshops: The Complete Buying & Usage Guide
An ultrasonic cleaner for automotive workshops uses high-frequency sound waves (typically 28–40 kHz) to create microscopic bubbles in a cleaning solution. These bubbles collapse against metal surfaces — a process called cavitation — and physically lift away grease, carbon, rust, and brake dust from parts like carburetors, injectors, and brake components. For most workshops, a 20–40 liter ultrasonic tank with a heater and timer is the sweet spot for cleaning small to mid-sized auto parts in 10–20 minutes, without the scrubbing, solvents, or labor hours that manual cleaning demands.
Why Automotive Workshops Are Switching to Ultrasonic Cleaning
If you run or work in an automotive workshop, you already know the pain: carbon-caked fuel injectors, gummed-up carburetors, and brake parts coated in years of grime. Traditional methods — wire brushes, degreaser dips, compressed air — eat up labor hours and rarely clean the tiny internal passages where buildup actually causes performance problems.
Ultrasonic cleaning solves this differently. Instead of scrubbing the outside, sound waves agitate the cleaning fluid itself, sending it into every groove, thread, and internal channel. That’s why fuel injector specialists and engine rebuild shops have used the technology for decades — it’s the only practical way to clean inside a component without disassembling it further.
For workshop owners, the appeal is simple: less manual labor, more consistent results, and parts that get genuinely clean rather than just surface-wiped.
What is an Ultrasonic Cleaner, Exactly?
An ultrasonic cleaner is a tank fitted with transducers that convert electrical energy into high-frequency vibrations. These vibrations pass through a liquid (usually water mixed with a cleaning solution) and generate millions of tiny vacuum bubbles every second.
When those bubbles implode near a dirty surface, they release a tiny burst of energy — strong enough to dislodge contaminants, gentle enough not to damage most metals, plastics, or delicate components.
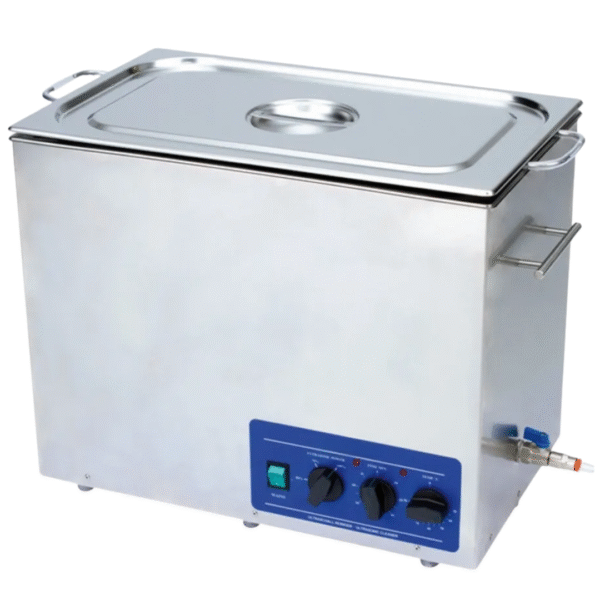
Core components of an ultrasonic cleaner:
- Tank — holds the cleaning solution and the parts
- Transducers — generate the ultrasonic waves
- Generator — powers the transducers and controls frequency
- Heater — warms the solution for better cleaning chemistry
- Timer — automates cleaning cycles
Common Automotive Parts Cleaned with Ultrasonic Technology
Part Type | Why Ultrasonic Cleaning Works Well |
Fuel injectors | Clears internal carbon deposits without disassembly |
Carburetors | Reaches tiny jets and passages manual cleaning misses |
Brake calipers & pads | Removes brake dust and corrosion from tight recesses |
Engine valves | Cleans carbon buildup from intricate shapes |
Alloy wheels | Lifts brake dust and road grime from spokes and crevices |
Small engine parts | Cleans bearings, gears, and fasteners uniformly |
How to Choose the Right Ultrasonic Cleaner for Your Workshop
Not every workshop needs the same machine. Here’s what actually matters when buying one.
1. Tank Size
Match the tank to your typical workload, not your biggest job:
- 2–6 liters — small parts, fasteners, individual injectors (independent mechanics, hobbyists)
- 20–40 liters — carburetors, brake components, multiple parts at once (most general workshops)
- 80+ liters — full engine component batches, fleet servicing (high-volume shops)
2. Frequency
- 25–28 kHz — stronger cavitation, better for heavy grease and rugged metal parts
- 40 kHz — gentler, better for delicate or precision components
Many commercial units offer dual-frequency or adjustable settings, which gives flexibility across different job types.
3. Heating Capability
Warm solution (typically 50–65°C) dramatically improves cleaning speed and effectiveness on oil and grease. A built-in heater is non-negotiable for serious workshop use.
4. Build Quality and Tank Material
Look for stainless steel tanks (SUS304 or better) that resist corrosion from automotive-grade degreasers and solvents over years of daily use.
5. Power and Run-Time Durability
Workshops run machines for hours daily. Check the duty cycle rating — cheaper units built for jewelry or lab use often aren’t designed for continuous industrial-grade operation.
Step-by-Step: How to Use an Ultrasonic Cleaner for Auto Parts
- Pre-clean loose debris. Knock off heavy grime or rust flakes before submerging parts — this protects the solution and transducers.
- Choose the right solution. Use a degreasing solution formulated for the metal type (aluminum needs a different pH than steel or brass).
- Fill and heat the tank. Heat to the manufacturer’s recommended range, usually 50–65°C.
- Position parts properly. Use a basket; never let parts touch the tank floor directly, as this can damage transducers.
- Set the timer. Light grime: 5–10 minutes. Heavy carbon or rust: 15–30 minutes, sometimes in repeated cycles.
- Rinse and dry. Always rinse with clean water and dry immediately to prevent flash rusting on ferrous parts.
- Inspect and repeat if needed. Stubborn deposits may need a second cycle rather than longer single sessions.
Expert tip: Replace cleaning solution regularly. A saturated solution redeposits contaminants onto parts instead of removing them — one of the most common reasons workshops think their machine “stopped working” when it’s actually the fluid.
Maintenance Tips That Extend Machine Life
- Drain and clean the tank weekly in high-use workshops
- Wipe down transducer surfaces to prevent scale buildup
- Use distilled or filtered water where local water is hard
- Avoid running the unit dry — it can damage transducers within minutes
- Check seals and timer calibration every few months
Manual Cleaning vs. Ultrasonic Cleaning: A Quick Comparison
Factor | Manual Cleaning | Ultrasonic Cleaning |
Labor time | High | Low to moderate |
Reaches internal passages | No | Yes |
Consistency | Varies by technician | Highly consistent |
Risk of part damage | Higher (scrubbing, scraping) | Lower (non-abrasive) |
Upfront cost | Low | Moderate to high |
Long-term cost per part | Higher (labor) | Lower over time |
Frequently Asked Questions
- What size ultrasonic cleaner does an automotive workshop need? Most general automotive workshops do well with a 20–40 liter tank, which comfortably handles carburetors, brake components, and small batches of parts. High-volume shops servicing fleets or full engine teardowns often move up to 80 liters or larger.
- Can ultrasonic cleaners damage automotive parts? When used correctly, ultrasonic cleaning is gentle and non-abrasive. Damage typically only occurs from using the wrong frequency for delicate parts, running incompatible solutions on sensitive metals, or letting parts touch the tank directly.
- How long does it take to clean a fuel injector ultrasonically? Most fuel injectors clean in 10–20 minutes per cycle, though heavily carbon-fouled injectors may need a second cycle with fresh solution for best results.
- What cleaning solution should I use in an ultrasonic cleaner for car parts? Use a degreasing solution designed specifically for automotive metals. Avoid generic household cleaners, as the wrong pH can corrode aluminum or discolor certain alloys over repeated cycles.
- Is an ultrasonic cleaner worth it for a small independent garage? Yes, for shops regularly handling injector cleaning, carburetor rebuilds, or brake servicing, even a compact unit pays for itself quickly by cutting labor time and improving cleaning consistency compared to manual methods.
Why Choose Hisashi Industries
Not all ultrasonic cleaners are built for the daily grind of a real workshop. Here’s what sets Hisashi Industries apart for automotive professionals:
- Industrial-grade build quality — Stainless steel (SUS304) tanks designed to withstand daily exposure to degreasers, solvents, and continuous-duty use, not occasional hobbyist cycles.
- Workshop-ready tank sizes — From compact units for small parts to large-capacity tanks for fleet and engine rebuild work, sized for real workshop throughput rather than one-size-fits-all.
- Reliable heating and timer controls — Precise temperature and cycle control so cleaning results stay consistent, batch after batch.
- Built for continuous operation — Components rated for extended daily run-time, reducing breakdowns during peak workshop hours.
- After-sales support and guidance — Direct access to expert advice on solution selection, frequency settings, and machine maintenance, not just a one-time sale.
- Competitive value for commercial use — Industrial performance without the inflated pricing of lab-grade equipment that’s overbuilt for automotive needs.
For workshops that depend on their equipment every single day, Hisashi Industries focuses on durability and consistency first — so your cleaning process doesn’t become the bottleneck in your service bay.
Conclusion
An ultrasonic cleaner isn’t just a convenience for automotive workshops — it’s a practical upgrade that saves labor hours, improves cleaning consistency, and reaches places manual methods simply can’t. Whether you’re cleaning fuel injectors, carburetors, brake components, or small engine parts, choosing the right tank size, frequency, and build quality makes the difference between a machine that earns its keep and one that sits unused.
If you’re ready to bring reliable, industrial-grade ultrasonic cleaning into your workshop, Hisashi Industries can help you find the right fit for your daily workload and budget.
Contact us today for a personalized recommendation, or call now to discuss the best ultrasonic cleaner for your workshop’s specific needs.